Builder Academy guide
Creating and editing components for Publish CMS with Builder Fusion
Build, preview, and publish code-backed components with a step-by-step for marketing, design, and engineering teams.
How the workflow works
Branch → preview → deploy → publish
Create a focused Fusion branch
Preview in a Publish test entry
Raise a PR through your normal process
Verify production preview before publishing
Prerequisites
Confirm these before starting any workflow.
Your Builder account is configured for Publish CMS and Fusion agentic AI
Publish is configured with content, models, and a component registry.
Fusion is connected to the repository that deploys your Publish CMS web app.
Fusion includes Publish-aware sub-agents, so no separate configuration is required once the products and repository connection are in place.
What is your role?
Choose the path closest to your job for a focused step-by-step workflow.
Step-by-step flow: Marketing workflow
Follow these steps in order and use the example prompts where helpful.
0/6
steps complete
Step 1 - publish
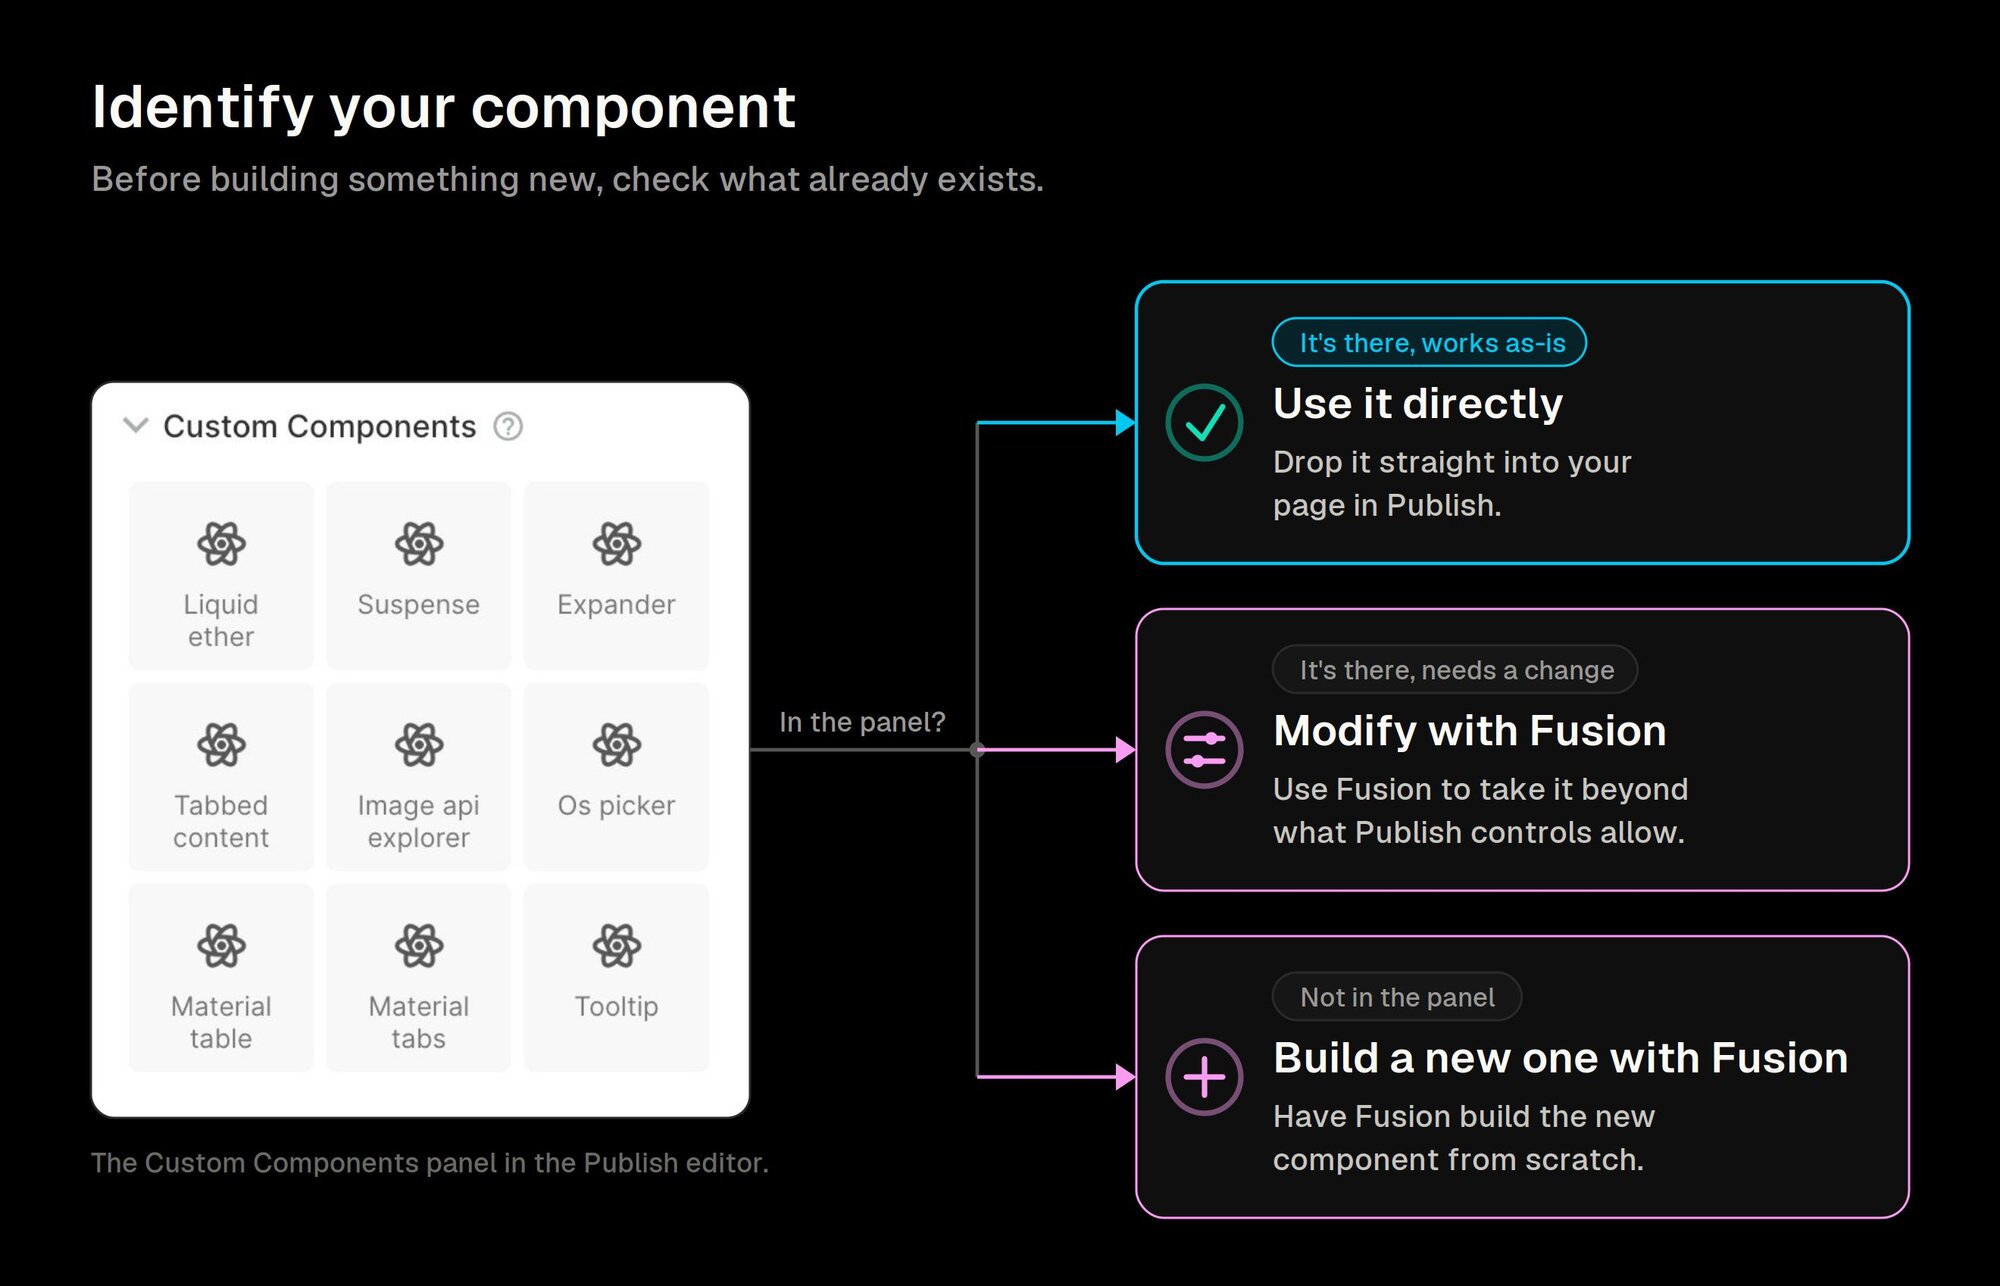
Identify your component needs
Components are the building blocks of your pages: banners, hero sections, countdown timers, product carousels, and so on.
Before building something new, check what already exists in Publish:
- Open the Publish editor and look for the Custom Components panel. If what you need is already there, add it to a page directly. If you need a change that isn't possible through the component's existing Publish controls, use Fusion to modify it.
Step 2 - fusion
Build your component in Fusion
In Fusion, start by creating a branch. This is a private workspace where your changes stay separate from the live site until engineering ships them. Give it a short descriptive name like “promo-banner-june”. Then describe what you want built. Be specific: mention the layout, what content it should include, and how it should look on mobile.
Example prompt
Strongly recommended: After Fusion builds the component, ask it to “build a preview page for this component so I can see how it looks and test different content.” This gives you a live view to review before connecting it to Publish.
Step 3 - fusion
Register the component in Publish
Example prompt
Tip: Be specific about which fields should be editable. The more clearly you describe what editors need to control, the better Fusion can wire it up.
Step 4 - publish
Preview in a Publish test entry
Switch to Publish to see the component in context. Use a test entry, a blank page kept separate from live content, so nothing goes out by accident.
- In Publish, open or create a test entry. Name it something like “Component Test Page” so it's easy to find and reuse. To create one, click New entry in your content list and leave it blank.
- Look for the Preview with a Fusion branch button next to the URL field at the top of the entry editor. Click it to open the preview panel.
- In the preview panel, choose the Fusion workspace, project, and branch you were just working in. This connects the preview to your in-progress component.
- Confirm your new component appears under Custom Components in the left panel. Add it to the page.
- Test all the editable fields (text, links, images). Any changes you make in Fusion on that branch appear here immediately, so you can iterate and recheck without leaving Publish.
Do not publish content that uses this component yet. It exists on your branch only, not on the live site. Publishing happens after engineering deploys the final code.
Step 5 - fusion
Send to engineering for review
When the component looks right in your test entry, go back to Fusion and click Send PR. This sends a code review request to your developer.
Let them know what you tested, which fields worked, and anything that must not change. They will review the generated code, make any needed adjustments, and push it to the live site.
Step 6 - publish
Verify and publish
Troubleshooting
Common issues and the fastest safe next action.
The component is missing in Publish.
Confirm the test entry is previewing the correct Fusion space, project, and branch. Then confirm Fusion registered the component as a Publish custom component.
The branch preview works but production preview does not.
Wait to publish. Confirm the PR has been merged, the deploy completed, and the entry has been switched back to the default production preview URL.
Fields are not configurable in the visual editor.
Return to Fusion and explicitly name the fields, props, colors, or content model references that should be editable in Publish.
A production entry was pointed at a branch.
Switch it back to the default preview source immediately. Continue validation from a dedicated test entry until the component is merged and deployed.
Mappings or design tokens do not match expectations.
Pause before merge. Share the mismatch with Fusion, review the updated mapping or token registration, then validate again in Publish.
Role handoff
Use these handoff points to keep content, design, and code in sync.
Marketing
- Identify the content need and validate the editing experience in Publish.
- Keep branch-based previews isolated to dedicated test entries.
- Publish only after production preview verification passes.
Design
- Define visual behavior, responsive expectations, variants, and motion.
- Confirm configurable visual properties are clear for editors.
- Validate design tokens or brand styles before engineering review.
Engineering
- Review generated code, component registration, and content model mapping.
- Merge and deploy through the normal code pipeline.
- Confirm the deployed component renders from the default production preview URL.
Recommended motion: build one focused component on a Fusion branch, preview it from a dedicated Publish test entry, complete code review, verify the deployed component from the default preview URL, then publish content that uses it.